New in the Web Designer: A Step-by-Step Build Guide for Your Board
You've designed the board. Now the web designer tells you how to make it, from the first rip cut to the last coat of oil, worked out from your own design.
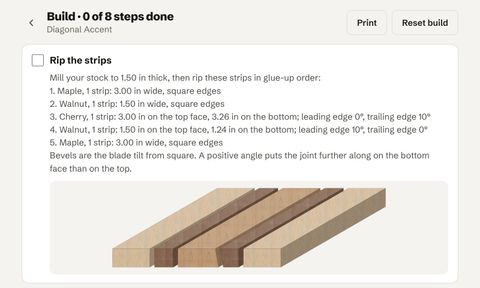
Quick answer: open a design in the web designer and click Build this board, next to the 2D/3D switch. You get an eight-step guide for that board: what to rip, how to glue it up, where to crosscut, how to arrange the slices, and how to flatten and finish. Each step has a 3D picture drawn from your design, and the glue-ups and finish have cure timers. The build guide is part of Pro.
From a pattern on screen to a list of cuts
Designing an end-grain board and building one are different jobs. The design is about how the pattern looks. The build is about strip widths, bevel angles, how many slices to cut and in what order to glue them. Working those out by hand is where most first boards go wrong; our list of common end-grain mistakes is mostly about the build, not the design.
The build guide does that arithmetic for you, using the same numbers as your design and the cut list. Change a strip's width or angle in the designer and the guide changes with it.
The eight steps
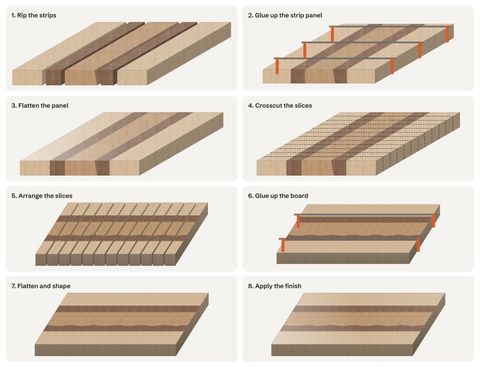
- Rip the strips. The thickness to mill your stock to, then every strip in glue-up order, with its wood, width and edges.
- Glue up the strip panel. The finished width of the panel, and a 24-hour cure timer.
- Flatten the panel. How long the panel is, so you can square one end before crosscutting.
- Crosscut the slices. How many slices to cut, and how thick each one is.
- Arrange the slices. Whether to flip or rotate every other slice, as set in your design.
- Glue up the board. How many slices go into the glue-up, and another 24-hour timer.
- Flatten and shape. Flattening the end-grain faces and trimming the edges square.
- Apply the finish. Oiling the board, with a 12-hour timer between coats. Our guide to food-safe finishes covers which oil to use.
Tick a step off when it's done. The guide keeps your progress for each board in your browser, so you can close the tab after the glue-up and pick up where you left off the next day.
Angled strips, worked out for you
Angled strips are what make patterns like zigzags, chevrons and 3D cubes, and they're the hardest part of the build to get right. When a strip has a bevelled edge, its top and bottom faces are different widths, and the next strip needs the same bevel on its leading edge to close the joint.
The guide lists both. In the Diagonal Accent template, the cherry strip has a 10° trailing edge, so the guide asks for a strip 3.00 in wide on the top face and 3.26 in on the bottom. That's an extra 1.5 in × tan 10°, or about 0.26 in. The walnut strip after it gets the matching 10° on its leading edge, and it's 0.26 in narrower on the bottom. Strips that repeat with the same angle are listed as parallel bevels. If a bevel is steeper than most table saws can tilt, past 45°, the guide tells you to cut it on a bandsaw or with a jig.
The pictures show the angles too. The strips are drawn with their ends facing you, so a bevelled joint shows as a sloped line on the end of the panel, just as you'll see it on the bench. When the design has angled joints, the glue-up step also tells you to clamp cauls across the faces, because angled joints tend to slide under clamp pressure.
Cure timers for the glue-ups and finish
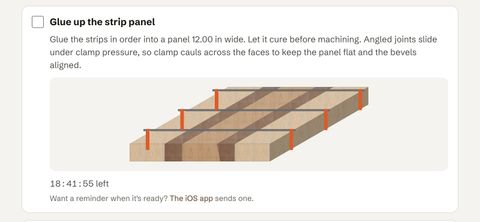
The two glue-ups and the finish each have a Start timer button. Click it when the clamps go on, and the step shows how long is left until the glue has cured. When the time is up, it says Ready. The timer is saved with the build, so it carries on if you reload the page or come back later.
A web page can't remind you once it's closed. If you want a notification when the glue is ready, the Cutting Board Designer iOS app has the same build guide and sends one. One Pro subscription covers both.
Print it for the shop
The Print button at the top of the guide prints every step with its picture and leaves out the buttons and timers. Pin it up next to the saw, or tape it to the bench for the glue-up.
How to open it
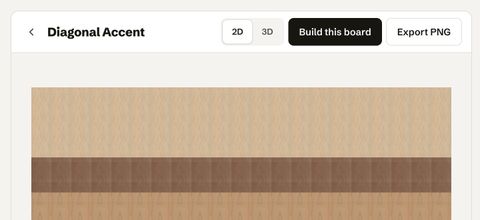
- Open the web designer and pick a board, or start one from a template. If you've not designed one before, start with our guide to designing an end-grain cutting board.
- Click Build this board in the toolbar, next to the 2D/3D switch.
- Work through the steps, ticking each one off as you go. The back arrow takes you to the design if you want to change something.
The build guide is part of Pro, together with the 3D preview, unlimited projects and cloud sync. If you're on the free plan, the button shows a PRO tag, and clicking it shows you what Pro includes.