Food-Safe Finishes for End-Grain Cutting Boards
The finish you choose is the last decision you make and the one that determines whether a beautiful board lasts a decade or cracks inside a year.
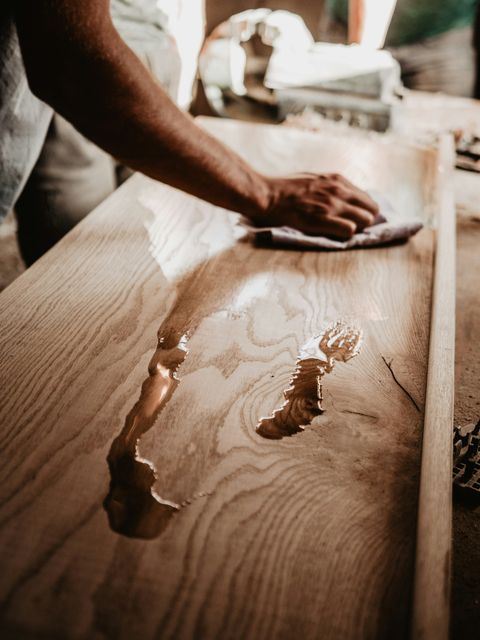
You spent real time on the design. You sourced the lumber, ripped the strips, glued up the panel, crosscut the slices, and sanded through every grit to the final 220. Now you're standing at the bench with a finished end-grain board and a collection of bottles, jars, and opinions from every woodworking forum you found at 1 a.m. Mineral oil. Beeswax. Board butter. Walnut oil. Raw linseed. Tung oil. They can't all be right — and a few of them are genuinely wrong.
This guide cuts through the noise. Here's what actually works, what to avoid, and how to apply a finish that protects the wood and keeps food safe.
Why End-Grain Boards Need Finishing Differently
End grain is porous in a way face grain never is. When you look at the top surface of an end-grain board, you're looking directly into thousands of open wood tubes — the same channels that moved water and nutrients through the living tree. They absorb finish aggressively, they release moisture quickly, and they move with humidity changes more than any other wood surface you'll work with.
That porosity is also what makes end-grain boards ideal for knives. The blade slides between fibers rather than cutting across them, which is gentler on edges and self-healing over time. But it means you need a finish that can penetrate deep enough to stabilize those open cells, not just coat the surface.
Film-forming finishes — polyurethane, lacquer, shellac — are off the table for food contact surfaces. Even food-safe formulations won't hold up; end-grain movement will crack a rigid film coat within months. You need a penetrating finish that moves with the wood.
The Core Options
Mineral Oil: The Starting Point for Every Board
Food-grade mineral oil is the universal base coat for cutting board finishing. It's inexpensive, odorless, tasteless, shelf-stable, and available at any pharmacy or woodworking supplier. Critically, it doesn't go rancid — which rules out most cooking oils for this job.
Mineral oil alone won't provide maximum protection. It's not a "finish" so much as a conditioning treatment — it saturates the wood cells and reduces how much moisture the board will absorb from wet produce and washing. But it stays liquid, meaning it will eventually migrate out of the wood and need replenishment.
How to apply: Warm the oil slightly (set the bottle in a bowl of hot water for a few minutes — don't microwave). Apply a generous coat with a clean cloth, working it into the surface and letting it sit for 20–30 minutes. Wipe off any excess. Repeat daily for the first week, then let the board rest. You'll notice the oil stops absorbing quickly; that's saturation. A well-conditioned board needs a maintenance coat every month or two depending on use.
Beeswax: The Sealing Layer
Beeswax applied over mineral oil changes the performance of the finish considerably. Where oil penetrates, wax seals — it fills surface irregularities, repels water rather than just slowing absorption, and gives the board a low sheen that looks intentional. Natural beeswax is food-safe with centuries of culinary use behind it.
The standard workflow is to condition with mineral oil first, let the board rest for 24 hours, then rub in a beeswax block warmed slightly with a heat gun or in a low oven. The heat liquefies the wax into the surface; as it cools, it solidifies in place. Buff with a clean cloth.
Board Butter: Mineral Oil + Beeswax in One Step
Board butter (also sold as cutting board conditioner or wood butter) is a blend of mineral oil and beeswax in roughly a 4:1 ratio. It combines the penetration of oil with the sealing properties of wax in a single application, which is why it's become the dominant finish recommendation in woodworking communities over the last few years.
For a new board, start with two or three straight mineral oil conditioning coats before switching to board butter — the initial saturation requires more penetration than wax-blended products provide. After that, board butter is the ideal maintenance finish: apply, let sit, buff off, done.
You can make your own by melting beeswax into warm mineral oil (roughly 1 oz wax per 4 oz oil), pouring into a tin, and letting it solidify. The result is identical to commercial products at a fraction of the cost — and if you're building boards to sell or gift, branded homemade tins are a nice finishing touch.
Fractionated Coconut Oil: A Solid Alternative
Fractionated coconut oil (not regular coconut oil, which solidifies) is another shelf-stable, food-safe option. It doesn't go rancid the way long-chain fatty acids do, and it penetrates similarly to mineral oil with a slightly richer feel. It costs more than pharmaceutical mineral oil and performs comparably, so the main reason to use it is if you prefer a plant-based product.
What to Avoid
Olive oil, vegetable oil, canola oil: All contain unsaturated fatty acids that oxidize. They'll go rancid inside the wood within weeks, giving the board an off smell that no amount of washing removes. This is the single most common finishing mistake on forums.
Raw linseed oil: Pressed from flaxseed without additives, raw linseed takes weeks to cure in a thin film and months in thick penetrating applications. More importantly, rags soaked in raw linseed oil are a spontaneous combustion hazard. Not appropriate for cutting boards.
"Pure tung oil" (verify carefully): Actual pure tung oil is food-safe once fully cured, but most products labeled "tung oil finish" are blended with mineral spirits, metallic driers, or varnish — none of which are food-safe. If you go this route, verify the product contains only tung oil.
Any film-forming finish (polyurethane, lacquer, shellac): Will crack on end-grain surfaces within months. Even if food-safe, the cracked film becomes a harbor for bacteria.
Matching Your Finish to Your Wood Species
Different species absorb finish at different rates, and this matters when you're working with two or more contrasting woods — which describes most well-designed end-grain boards. Walnut is open-grained and drinks oil quickly. Maple is tight-grained and takes more coats to saturate. If you're building a walnut and maple cutting board or a similar high-contrast design, the maple sections may look under-finished while the walnut is already saturated — just keep applying coats until both look consistent.
Purpleheart and jatoba have denser cell structures and are slower to absorb. Ebony is so dense it barely takes oil at all; focus on the beeswax sealing step. Cherry, in contrast, absorbs quickly and develops a rich patina with oil finish that darkens over time — one of the reasons cherry-walnut boards are popular gifts.
A Simple Finishing Schedule
| Phase | Product | Frequency |
|---|---|---|
| New board conditioning | Mineral oil | Daily for 7 days |
| First seal | Board butter | After initial conditioning |
| Regular maintenance | Board butter | Monthly, or when wood looks dry |
| Deep reconditioning | Mineral oil + board butter | After heavy use or discoloration |
The "looks dry" test is reliable: hold the board at an angle in natural light. When the surface starts to look matte and thirsty rather than gently sheened, it's time for a coat.
Long-Term Care
A well-finished end-grain board should never go in a dishwasher or sit submerged in water. The heat and prolonged moisture exposure will cause the glue joints to fail and the wood to warp — no finish prevents this. Wash by hand with mild soap, dry immediately, and stand it on edge to let both faces dry evenly.
If a board develops surface mold after being stored damp, sand back to bare wood starting at 80 grit, clean with a 3% hydrogen peroxide solution, let dry completely, and restart the conditioning schedule from scratch.
A board that's properly conditioned, dried between uses, and recoated every few months will outlast most kitchen tools. The wood darkens and develops character over years of use in a way that cutting boards made from other materials simply don't.
Planning an end-grain board and want to nail the design before you buy the lumber? Cutting Board Designer lets you model any pattern — strips, block sizes, wood species, kerf — and generates a complete cut list so you know exactly how much of each species you need. Once the wood is in hand, the end-grain cutting board design guide walks through the full construction sequence from ripping strips to the final glue-up.