Design a 3D Cube Illusion End-Grain Cutting Board
Three woods, one 60-degree jig, and careful planning produce an end-grain board that looks like stacked cubes — and stops guests mid-sentence.
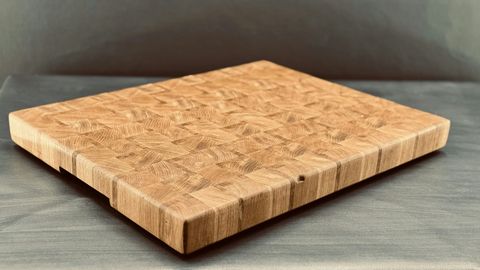
Of all the end-grain cutting board patterns making the rounds in woodworking communities right now, the 3D cube illusion draws the most second glances. Three shades of wood — light, medium, dark — are cut into diamond shapes and arranged so the end grain face reads as an isometric grid of floating cubes. It's an optical trick, but a durable, food-safe one that will still look stunning a decade from now.
The tricky part isn't the glue-up — it's the planning. Cut your strips the wrong width, angle the miter even a degree off, or mix up the assembly sequence, and the illusion falls apart. This guide walks through everything you need to work out before the first board hits the table saw.
Why This Pattern Is Having a Moment
Search any woodworking forum or browse r/woodworking and you'll find the 3D cube board popping up constantly in 2026. A few reasons:
- The contrast is dramatic. Walnut, cherry, and hard maple sit at opposite ends of the color spectrum, so even a modest board reads as a statement piece.
- It scales. A 10 × 14 inch prep board and a 16 × 22 inch butcher block use exactly the same geometry — only the strip count changes.
- It photographs well. The isometric pattern catches light differently depending on shooting angle, which means it spreads organically on social feeds.
The flip side: this is an intermediate-to-advanced project. You're making multiple glue-ups, ripping precise angles on a table saw, and keeping track of orientation through every step. Getting the design right on paper (or screen) before buying wood is not optional.
The Geometry Behind the Illusion
Each "cube" in the pattern is made of three rhombuses — one per wood species — meeting at a central point. When you look at the face:
- The top face appears lit: use your lightest wood (hard maple is the classic choice).
- The left face appears in shadow: use a mid-tone (cherry works perfectly).
- The right face appears darker still: use your darkest wood (walnut or ebony).
To create those rhombuses from straight strips, you cut at 60 degrees off square. Each strip produces parallelogram segments. The three species are glued into angled rows, then those rows are glued together to form the full slab before slicing crosswise into the final end-grain board.
A single cube unit needs:
- One 60° parallelogram in maple
- One 60° parallelogram in cherry
- One 60° parallelogram in walnut
The strip width (measured perpendicular to the edge) determines how large each cube face is. A 1-inch strip width produces visually crisp cubes at typical kitchen-counter distance. Going narrower (¾ inch) creates a finer, almost textile-like pattern; going wider (1.25 inches) makes the cubes more dominant but requires a wider starting blank.
Wood Selection
If you haven't read our guide to choosing the best wood for a cutting board, do that first — the short version is that you want dense, closed-pore hardwoods with a Janka hardness above 1000 lbf.
For the 3D cube pattern, you also need tonal contrast. The illusion only works if the three species are visually distinct. Here's the combination that gives the cleanest result:
| Role | Species | Janka (lbf) | Notes |
|---|---|---|---|
| Light | Hard maple | 1450 | Bright, creamy white — the "lit" face |
| Mid-tone | Cherry | 950 | Warm amber-pink — deepens with age |
| Dark | Walnut | 1010 | Rich chocolate brown |
Cherry is technically just below 1000 lbf, but it performs fine in practice — it's used in professional cutting boards worldwide. Avoid substituting red oak (open pores) or pine (too soft).
If you want an even darker contrast on the shadow face, ebony (3000 lbf) makes a stunning substitution for walnut, but it's expensive and the dust requires a respirator.
Planning the Strip Count and Board Size
This is where most builders get tripped up. The final board dimensions are a function of:
- Strip width — how wide each individual species strip is before angling
- Number of cube columns across the width
- Blade kerf — material lost at every cut (typically 0.125 inches on a table saw)
- Glue-line compression — negligible but real
For a 12-wide board using 1-inch strips and a standard kerf:
- You need 12 columns of cubes across
- Each column requires one strip of each species
- The angled cuts reduce effective width slightly, so start strips at 1.125 inches before the 60° cut
Working this out by hand is possible, but tedious — you're recalculating every time you adjust a strip width or decide to change dimensions. This is exactly the kind of design iteration that the end-grain cutting board design guide covers, and where a planning tool like Cutting Board Designer earns its keep: adjust a strip width and the cut list updates instantly, so you can see the impact on waste before making a single cut.
Sequence Matters: Build a Row Template First
The biggest assembly mistake is gluing strips in the wrong order. Before touching the glue bottle:
- Label every strip (M for maple, C for cherry, W for walnut) and mark the 60° angle direction with an arrow.
- Build one test row dry — no glue — and verify the rhombuses align correctly before committing.
- Glue row-by-row, not all at once. Let each row cure 30 minutes before adding the next. The 60° angles create lateral stress; clamping a full slab at once invites slippage.
The row sequence should alternate so that when rows are placed side by side, the angled cuts on adjacent rows nest together correctly. If a row is flipped, you'll get a mirror-image pattern — still pretty, but not the cube illusion.
Finishing the Surface
End-grain cuts mean you'll see the 3D pattern clearly only after flattening and final sanding. Run the glued slab through a drum sander or hand-plane flat before the crosscut slices. After slicing and re-gluing, flatten again — end-grain boards can telegraph every glue-line if they're not absolutely flat before final surface prep.
Finish sequence:
- 80 → 120 → 180 → 220 grit
- Flood with food-grade mineral oil and let it soak 20 minutes; wipe off excess
- Repeat the oil soak twice more over 48 hours
- Optional: apply a 4:1 mineral oil/beeswax finish for a harder surface layer
The oil dramatically deepens the contrast between species — walnut goes from brown to near-black, maple holds its cream, and cherry shifts warm amber. This is when the cube illusion snaps into full effect for the first time.
Before You Buy Wood
A 3D cube board uses wood efficiently, but you do need precise quantities. Overbuying wastes money; underbuying mid-project means trying to match a specific lot of walnut weeks later. Work out your full cut list — strips needed per species, gross board feet including waste allowance — before ordering.
If you want a visual preview of exactly how your chosen dimensions, strip widths, and wood tones will look assembled, Cutting Board Designer renders a 2D top-down preview and generates a cut list you can take straight to the lumber yard. It's a quicker way to experiment than drawing parallelograms by hand.
The 3D cube board is one of the most impressive things you can put on a kitchen counter. Get the planning right, stay patient through the multiple glue-ups, and the result is a board people assume you bought rather than made.