End-Grain Cutting Board Patterns: 7 Designs and How Each Is Made
Every end-grain pattern comes from the same two glue-ups. What changes is the strip layout, the angle of the cuts, and what you do to every other slice.
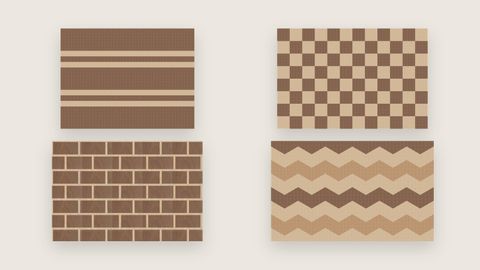
Quick answer: most end-grain cutting board patterns are made the same way. You glue strips into a panel, crosscut the panel into slices, turn the slices on end and glue them back together. The pattern comes from three choices: how you arrange the strips, whether their edges are angled, and whether you turn over or rotate every other slice. Stripes and checkerboard need only square cuts. Brick, chevron, herringbone and 3D cube need offsets, angles or careful stacking.
The patterns at a glance
| Pattern | Cuts | Every other slice | Difficulty |
|---|---|---|---|
| Stripes | Square | Left as is | Beginner |
| Checkerboard | Square | Rotated 180° | Beginner |
| Three-wood bands | Square | Left as is or rotated | Beginner |
| Brick (running bond) | Square | Rotated or shifted to offset the rows | Intermediate |
| Diagonal accent | One angled band | Left as is | Intermediate |
| Chevron and herringbone | Angled strips (chevron) or stepped sticks (herringbone) | Turned over (chevron) | Intermediate to advanced |
| 3D cube | 60° | Assembled in angled rows | Advanced |
Stripes
The simplest end-grain board. Strips of two or more woods are glued into a panel and crosscut, and the slices are glued back in the same orientation, so the stripes run straight across the board. It's the best first build: there's nothing to line up between slices, and you learn both glue-ups without any risk to the pattern. Vary the strip widths for interest. A thin maple line between wide walnut bands looks very different from equal stripes.
Checkerboard
Equal-width strips of two contrasting woods, with every other slice rotated 180°, end for end, before the second glue-up. Each rotated slice starts with the opposite wood, so the squares interleave into a checkerboard. Use an even number of strips, and keep every strip exactly the same width, or the squares won't line up. The full walkthrough: checkerboard cutting board designs and plans.
Three-wood bands
Add a third wood, usually cherry between walnut and maple, as a band or an accent strip. Laid out as stripes, it gives a calm, layered board; with every other slice rotated, it becomes a three-colour grid. See the three-wood board guide for layouts that work.
Brick (running bond)
Like a checkerboard, but every other row shifts by half a block, so no seam runs straight through more than one row, as in a brick wall. You get the offset either from a lopsided strip layout with every other slice rotated, or by sliding alternate slices half a block along and trimming the edges. Either way, alternate rows end in half blocks, which you can keep as a feature or hide with a border. Strip maths and layout: brick pattern cutting board plans.
Diagonal accent
A straight-striped board with one band cut at an angle, so a diagonal line runs across the end grain. It adds movement without committing you to a fully angled pattern. The catch is the geometry: the angled band changes how its neighbours meet, so plan it before you cut. The web designer warns you about angles that can't be cut cleanly before you get to the saw.
Chevron and herringbone
A chevron is made from strips ripped with angled edges. Turn every other slice over before the second glue-up and the angles point in opposite directions, meeting in a row of Vs. A true herringbone is built differently, from rectangular sticks glued into a stepped bundle, which gives the staggered, parquet-floor look. Both depend on accurate, repeatable cuts more than anything else. Both methods, step by step: herringbone and chevron cutting boards.
3D cube
Three woods cut at 60° into diamond shapes and assembled so that each group of three reads as a cube, with a light, a medium and a dark face. It's the hardest pattern here and the least forgiving: a degree off on the angle or a strip out of order and the illusion breaks. Plans and geometry: 3D cube cutting board plans.
Choosing woods for any pattern
Contrast does most of the work. Walnut and hard maple are the classic pair because they're hard enough for a cutting surface and about as far apart in colour as domestic hardwoods get. Cherry adds a warm middle tone that darkens with age, and exotics like purpleheart and jatoba add colour. Read choosing the best wood for a cutting board before you buy.
Plan the pattern before you cut
Every pattern above changes your cut list. Angled strips change the board's width and leave zig-zag edges to trim, offsets cost wood when you square up the stepped edges, and all those slices have to come out of a panel that's long enough. Design the pattern in the free web designer: set each strip's wood, width and angle, flip or rotate alternate slices, and the cut list, with strips, slices and board feet, updates as you go.