Brick Pattern End-Grain Cutting Board
The running bond is one of woodworking's oldest arrangements — and on an end-grain cutting board, it looks like you spent twice as long on it as you actually did.
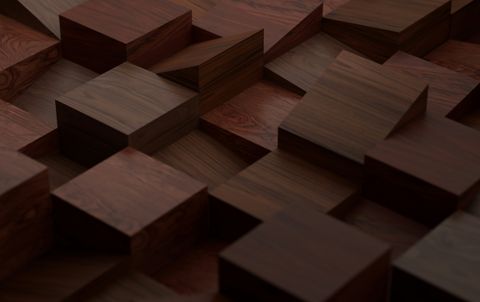
Spend any time on r/woodworking in 2026 and you'll notice the brick-pattern cutting board keeps appearing in project galleries — not the checkerboard, not the herringbone, but the running bond. Simple staggered rows of rectangular blocks, offset by half a unit from one row to the next. It's the pattern that built civilization's foundations, and it looks just as good scaled down to a 12 × 18 kitchen board.
The appeal is structural as much as visual. Unlike the herringbone end-grain cutting board with its angled cuts or the 3D cube illusion requiring precise three-tone tonal control, the brick pattern uses only straight crosscuts. If you can rip strips through a table saw and crosscut them to length, you can build this board. The difficulty lives in the glue-up discipline, not the joinery.
This guide covers everything you need to plan before you buy a single board-foot of lumber.
Why the Brick Pattern Is Trending
Running bond has been impossible to miss in interior design: subway tile backsplashes, brick-effect wallpapers, running-bond hardwood floors. Homeowners living with those aesthetics inevitably want their cutting boards to match the visual language of their kitchens. A walnut-and-maple brick board on a white marble counter lands the same way a statement tile backsplash does — intentional, substantial, obviously hand-made.
There's also a practical reason it's finding an audience among first-time end-grain builders: it reads as ambitious without requiring the jig setups that herringbone demands. The stagger is built into how you orient alternating rows, not into mitered cuts. That's a meaningful distinction for anyone working with a two-saw shop.
The Geometry: Running Bond vs. Checkerboard
In a checkerboard, every row is identical and seams align vertically. In a running bond, every other row shifts by exactly half a block width, so no vertical seam ever runs more than one row before it's interrupted by a block. That offset is what gives brick its distinctive rhythm: the eye follows implied diagonals even though no diagonal cut exists anywhere in the board.
For an end-grain build, here's the anatomy of a single brick unit:
- Block width (W): The short dimension — set by your strip thickness after jointing.
- Block length (L): The long dimension — typically 1.5× to 2× the width for a classic brick aspect ratio.
- Mortar gap (optional): A thin strip of contrasting wood between rows that mimics grout lines.
The offset means your board will always have half-blocks at the left and right edges of alternating rows. You can let those stand as design elements — they look intentional — or add a solid border strip to frame the entire pattern.
Choosing Wood Species for Contrast
A brick pattern lives on the difference between your two species. The stronger the contrast, the crisper the running bond reads from across the room. Here's how the best combinations play specifically for this pattern:
| Pairing | Contrast | Character |
|---|---|---|
| Walnut + Maple | High | Classic; works in any kitchen |
| Cherry + Maple | Medium | Warm; subtle but deepens with age |
| Purpleheart + Maple | Very high | Dramatic; bold modern look |
| Jatoba + Maple | High | Reddish-orange against cream; rich and warm |
| Walnut + Cherry | Low-medium | Sophisticated; two dark tones separated by grain |
High contrast makes the pattern legible at a glance. Low contrast creates a more monochromatic, textural board that holds up quietly. Both are valid; the choice depends on the kitchen it's going into.
For a deeper look at how each species behaves under use and how to pick for durability, the guide to choosing the best wood for a cutting board covers hardness, grain stability, and food-safety considerations across all the common hardwoods.
Strip Math: Width, Length, and the Half-Block Offset
End-grain construction reverses the usual workflow: glue face-grain strips into a striped panel, crosscut that panel into slices, flip the slices 90 degrees to expose end grain, then glue the slices into the final board. The brick pattern adds one step: alternate rows must offset by half a block, which you achieve either by cutting one slice of each row in half before the final glue-up or by planning an extra partial strip in advance.
Decide your block aspect ratio first. A 3:2 ratio (length to width) reads as a standard brick. A 2:1 ratio looks chunkier and more contemporary. For a 12-inch-wide finished board, four columns of 3-inch blocks works cleanly — enough for the pattern to read clearly without feeling oversized.
Work backwards from finished dimensions:
- Target finished board width ÷ number of columns = block width (before milling losses)
- Block length = 1.5× to 2× block width
- Strip thickness (first glue-up) = target block width + jointing allowance (~⅛")
- Crosscut slice thickness (second glue-up) = target block length + sanding allowance (~3/16")
For each crosscut, your table saw blade removes roughly ⅛" of material. That kerf loss compounds quickly across a 20-slice board — plan for 15–20% extra material beyond your target dimensions, and factor kerf into every slice thickness calculation. A common beginner mistake is cutting slices to the exact target thickness and discovering the finished board falls short after milling.
Mortar Lines: The Detail That Changes Everything
Traditional brick has mortar between courses. You can replicate this in wood by gluing a thin strip (⅛" to 3/16") of a third species between each horizontal row during the final glue-up. The effect is subtle on paper and striking in practice — it sharpens every row boundary and adds a third color that prevents the pattern from going flat.
The mortar species should sit tonally between your two primary woods. For walnut and maple, cherry is the natural choice: warm enough to complement the walnut, light enough to separate from it. For purpleheart and maple, cherry mortar creates a warm middle layer between the purple-red and the cream.
A few practical notes on mortar strips:
- Keep them thin. Four mortar lines on a six-row board adds roughly ¾" to your total assembled width before final milling.
- Mill them to consistent thickness before the glue-up — any variation shows in the finished board.
- Joint the mating faces before gluing. Mortar strips are end-grain adjacent and will telegraph any gap.
You can build a beautiful brick board without mortar lines, especially in high-contrast species pairings where the seam between rows is naturally crisp. But if you're comfortable with the primary glue-up and want to push the build further, mortar is the detail that separates a good board from one people ask about.
Planning the Full Build
The end-grain cutting board design guide walks through the complete construction sequence. For brick pattern specifically, two steps deserve extra care:
The crosscut sled matters more here than in most builds. The half-block offset is unforgiving: if your slices vary even slightly in thickness, alternating rows won't sit flush and any mortar lines won't be consistent. A sled with a repeatable stop block is worth setting up before the first cut.
Arrange slices dry before gluing. Lay out all your rows on the bench, confirm the offset reads correctly from every angle, and check that your species alternate as intended. The brick pattern can look busy during assembly — seeing it dry first prevents an expensive surprise during clamp-up.
Once the consistency is there, the pattern builds quickly. Two species, straight cuts, one offset rule — and a board that consistently stops people mid-conversation when it lands on a counter.
Ready to model your board before buying lumber? Cutting Board Designer lets you set board dimensions, wood species, strip widths, and kerf, then generates a full cut list and live 2D preview — so you can adjust the brick proportions and row count until the design is exactly what you want before a single strip leaves the rack.