How Much Wood Do You Need for a Cutting Board?
Most builders leave the lumber yard either short or holding an expensive extra board — here's how to shop the right amount the first time.
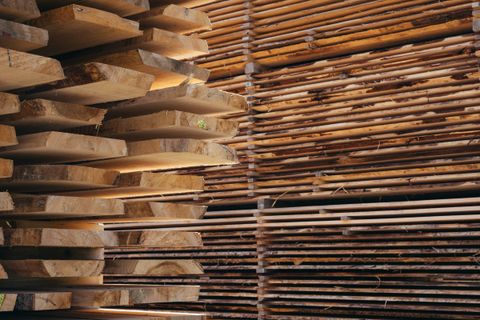
Standing at the hardwood rack trying to figure out how many board feet to pull is one of the more uncomfortable moments in a cutting board project. Grab too little and you're back for a second trip — and good luck matching the same batch. Grab too much and you've tied up $40 or $60 of walnut sitting in the shop indefinitely.
End-grain cutting boards are more wood-hungry than they look. The build process has real waste baked in: every rip cut burns an eighth of an inch of kerf, every crosscut does the same, and the panel needs to be surfaced flat and squared before you can glue up the final board. Get the calculation wrong and you'll find out mid-build.
This guide walks through the math, explains where the waste actually goes, and gives you a practical formula to shop confidently.
How an End-Grain Build Uses Lumber
Understanding where wood goes is the fastest way to understand why you need more than you think.
The typical end-grain build works like this:
- Mill your stock — Rough lumber gets jointed, planed, and ripped to consistent strips. This removes 1/4 to 3/8 inch across the thickness of each board.
- Rip into strips — Strips for an end-grain board are usually 1.5 to 2.5 inches wide. Each rip cut burns a saw kerf: about 1/8 inch with a standard blade, up to 3/16 inch with some table-saw blades.
- Glue up the panel — Strips are glued edge-to-edge into a wide panel. The panel thickness equals your strip thickness — which becomes your finished board's thickness.
- Crosscut into slices — The panel is crosscut into segments perpendicular to the glue lines. Each crosscut also burns 1/8 inch of kerf.
- Rotate and glue the final board — The slices are turned end-grain-up and glued side by side. The cut faces become your board's surface.
Every rip and every crosscut costs material. On a board with 10 strips, you've made 9 rip cuts and thrown away over an inch of wood before you've touched the crosscut sled. On a panel that yields 12 slices, another 11 kerfs vanish into sawdust.
The Board-Feet Formula
Board feet is how hardwood lumber is sold. One board foot = 144 cubic inches of wood (think 12″ × 12″ × 1″).
The formula:
Board feet = (Length × Width × Thickness) ÷ 144
All dimensions in inches.
Example: a 12″ × 16″ × 1.75″ finished board
- 12 × 16 × 1.75 = 336 cubic inches
- 336 ÷ 144 = 2.33 board feet
That's the volume of your finished board. Now add waste.
Where the Waste Goes
End-grain construction has four distinct waste sources. Each one is real and not optional.
| Waste source | Typical loss |
|---|---|
| Milling (jointing + planing both faces) | 1/4″ – 3/8″ per board |
| Rip kerf (per cut) | 1/8″ – 3/16″ |
| Crosscut kerf (per cut) | 1/8″ |
| Panel squaring and trimming | 3/8″ – 1/2″ per side |
For a 12-strip, 12-slice board using a standard table saw:
- 11 rip kerfs at 1/8″ each = 1.375″ gone
- 11 crosscut kerfs at 1/8″ each = 1.375″ gone
- Panel trimming on four sides = ~1.5″ gone total
That's over 4 inches of material lost to kerf and trimming alone, before accounting for surfacing or the occasional strip you reject because of a bow or a check in the wood.
A safe rule: add 35–40% to your calculated board feet when you're buying for an end-grain project.
For our 2.33 BF board: buy at least 3.25 board feet, and rounding to 3.5 BF gives comfortable margin.
A Practical Example: Planning a 12″ × 16″ Board
Let's run through a full shopping calculation.
Target board: 12″ wide × 16″ long × 1.75″ thick
Strip width (after milling): 2.25″
Species: walnut and hard maple, roughly half-and-half
Step 1 — Calculate strips needed for width
12″ wide board ÷ 2.25″ per strip = 5.3 → 6 strips minimum
With 6 strips you get about 13.5 inches of panel width before squaring. After trimming, ~12 inches — right on target.
Step 2 — Calculate slices needed for length
16″ finished length. Each slice is cut ~1.5″ thick (this becomes the board thickness after rotation, so match to your desired thickness). With 1/8″ kerf per cut:
Slices needed = 16 ÷ 1.5 = 10.7 → 11 slices
To cut 11 slices you need a panel at least 11 × (1.5 + 0.125) = 17.9 inches long before the first crosscut. Buy strips at least 20 inches long to leave squaring and setup margin.
Step 3 — Calculate lumber to buy
Each strip is 1.75″ thick × 2.25″ wide × 20″ long.
Board feet per strip: (1.75 × 2.25 × 20) ÷ 144 = 0.55 BF
6 strips × 0.55 BF = 3.3 board feet total
Add 35% waste: 3.3 × 1.35 = 4.45 BF to buy
Shopping cart: 2.5 BF walnut + 2 BF hard maple = 4.5 BF — close enough.
Step 4 — Species proportions
With three walnut strips and three maple strips, the alternating pattern gives roughly even coverage. If you want a 2:1 walnut-to-maple ratio, adjust to four walnut strips and two maple strips — same total BF, different proportions on paper. Map this out before you buy so you're not estimating at the rack.
The end-grain cutting board design guide covers how strip arrangement translates to the visual pattern — worth reading before you lock in your species split.
Multi-Species Builds: Shopping Two Species at Once
When you're mixing woods, calculate BF for each species separately. Don't lump them together and try to split the answer at the store.
Walnut and maple are not the same price. If your board needs 2.5 BF of walnut at $12/BF and 2 BF of maple at $5/BF, your material cost is $40 — not four-and-a-half feet of "generic hardwood." Know each species quantity independently.
The best wood for a cutting board guide has a comparison of common species by hardness, price, and availability — useful reference when you're deciding which combinations are worth the cost.
Grain Orientation Reminder
One thing that trips up beginners: the width of your strips and the thickness of your starting lumber are separate decisions.
- Strip thickness = your finished board's thickness. Want a 1.75″ board? Start with lumber you can mill to 1.75″ (rough 8/4 stock is ideal).
- Strip width = the size of each color "column" in your pattern. Narrower strips (1.5″) give a tighter pattern; wider strips (2.5″) are easier to work and produce bolder geometry.
Getting these mixed up and buying 4/4 stock when you needed 8/4 is the kind of mistake that's hard to fix at the bench.
Using the App to Lock In Your Numbers
Once you've settled on dimensions and strip layout, Cutting Board Designer calculates your cut list for you — number of strips, strip lengths, board dimensions, and kerf allowances. It's a faster way to sanity-check your shopping math before you drive to the lumber yard, especially on multi-species designs where the proportions get fiddly.
Download Cutting Board Designer and enter your target board size, strip width, and species mix. The cut list the app generates is the same list you can hand to yourself at the lumber rack.
Getting the wood order right the first time removes one of the most common friction points in the build. Run the numbers before you shop, add your 35–40% buffer for end-grain waste, and split your buy by species so you're not guessing ratios at the counter.