End-Grain Charcuterie Board: Design and Wood Tips
A charcuterie board that stops guests mid-conversation starts with the right end-grain design — here's how to get there.
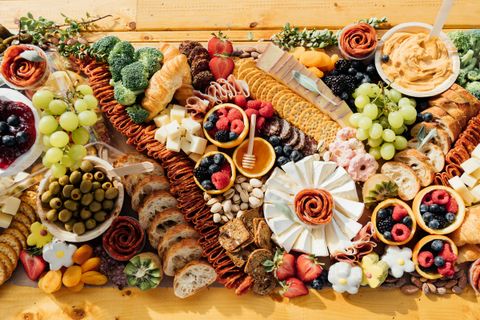
The charcuterie board has become one of the most requested woodworking gifts on the market — and for good reason. Unlike a standard kitchen prep board, a charcuterie board is a centerpiece. It sits on a dining table or countertop at eye level, surrounded by guests who will study it while they reach for a cracker. Every wood grain line and color transition is on display.
That visibility changes the design calculus entirely. End-grain construction — which exposes the cross-section of each wood strip rather than the long face — happens to produce the most visually interesting surface of any board type. The concentric rings, color variation, and texture you get from end-grain are exactly what makes a charcuterie board look like it belongs in a restaurant, not a big-box kitchen aisle.
This guide walks through how to size, plan, and build an end-grain charcuterie board that works as a serving piece first and a cutting surface second.
Charcuterie Boards vs. Cutting Boards: Key Differences
Before sizing anything, it helps to understand how a charcuterie board gets used differently from a prep board.
A prep board takes knife abuse. You're dicing onions, breaking down chickens, and slicing bread on it. The board needs to be thick (at least 2 inches for end-grain so the glue lines don't open up) and wide enough to contain the mess. Juice grooves matter because proteins bleed.
A charcuterie board mostly gets sliced cheese, small meats, and fruit placed on it — not chopped. The knife work is light. What the board needs instead:
- A generous surface area so arrangement looks intentional rather than cramped
- Visual drama — the pattern and wood color are part of the presentation
- A smooth, flat surface — no deep juice grooves, which trap crumbs and are hard to wipe between helpings
- Manageable weight — it travels from counter to table to dishwasher tray; a 10-pound slab is less practical than it looks
That last point is why many charcuterie boards are thinner than prep boards — 1¼ to 1½ inches is common. The structural demands are lower, and the weight savings are real.
Sizing: What Dimensions Actually Work
Here's a practical sizing reference for end-grain charcuterie boards based on how many people you're serving:
| Use case | Width | Length | Thickness |
|---|---|---|---|
| Solo / couple | 8–9 in | 11–12 in | 1¼ in |
| Small gathering (4–6) | 10–12 in | 14–16 in | 1¼–1½ in |
| Party board (8+) | 13–15 in | 18–22 in | 1½ in |
| Long board / runner | 7–8 in | 20–24 in | 1¼ in |
The "long board" format has picked up serious traction recently — a narrow rectangle running most of the table length that guests reach over and around. It's well suited to end-grain construction because the lengthwise strips create a strong visual rhythm.
A few things to keep in mind when setting dimensions:
- Account for the glue-up and final flattening. Start your blank longer and wider than your target finished size. End-grain boards typically lose ¼–½ inch per edge during surfacing.
- Blade kerf adds up. Every rip cut through hardwood eats material. If you're working with 1/8-inch kerf, a 10-strip design across a 12-inch blank loses about 1 inch just from saw cuts before glue-up.
- Thickness affects visual scale. A thin board (1¼ in) with a prominent end-grain pattern looks elegant. A thick board (2½ in) looks substantial and more like a butcher block. Neither is wrong — they just read differently.
Wood Pairings for Maximum Visual Impact
A charcuterie board is a serving piece, so the visual contrast between wood species matters more than on a board that lives under a cutting mat. The most striking combinations use two or three species with clear tonal contrast:
High-contrast pairs
- Walnut + maple — the classic. Near-black walnut against white maple is hard to beat for drama. Every end-grain ring and pore structure shows up clearly. Works especially well with a simple stripe or brick pattern.
- Purpleheart + maple — the purple-to-white shift is unusual enough that it reads as intentional artistry. The color does fade slightly over time in sunlight, but it's still distinct.
- Ebony + maple — the darkest option available. The contrast is extreme and the result looks almost graphic. Best kept to simple patterns so the contrast does the work.
Warm, tonal pairs
- Cherry + walnut — the warm red-brown of cherry plays beautifully against the cooler dark walnut. This is a warmer, more subtle pairing than walnut-maple and tends to look more "food" than "furniture."
- Jatoba + cherry — jatoba's orange-red next to cherry's pink-red creates a tonal gradient that improves as cherry darkens with age.
Three-species designs
Three-species boards are harder to plan but visually rewarding. Walnut + cherry + maple is the most forgiving three-species combination — the dark/medium/light progression creates a natural gradient. Keep the center species widest to anchor the design.
If you're using Cutting Board Designer to plan your board, you can preview how any wood combination reads in the 2D top-down view before cutting a single strip. That's especially useful for three-species layouts where the layer order changes the whole character of the finished piece.
Pattern Ideas That Suit a Serving Board
Pattern choice has a bigger impact on a charcuterie board than a prep board because the entire surface is visible to your guests. A few patterns that translate particularly well:
Simple stripes are underrated. Four to six alternating strips of two species — say, walnut and maple in equal widths — produce a clean, modern look that photographs well and doesn't compete visually with the food on it. This is also the easiest design to execute without errors.
Brick / offset pattern (sometimes called a running bond) staggers the strips so vertical glue lines don't align row-to-row. On a charcuterie board it creates a subtle texture that looks handcrafted without being busy. The downside is more complexity in the glue-up; you're managing more pieces.
Checkerboard works on larger boards (14 inches and up). It reads as architectural at the right scale and makes a strong first impression. Keep the square size between ¾ inch and 1¼ inch — smaller feels fussy, larger can look unfinished.
Thin accent stripe — a single narrow strip (3/8–½ inch) of a contrasting species between wider strips of two other woods. The accent line doesn't dominate but adds a refinement that signals the builder was intentional. Ebony works especially well as an accent stripe.
For a deeper look at how to build the geometry for patterns like these, the end-grain cutting board design guide covers the strip math from scratch.
Finishing a Charcuterie Board
A charcuterie board needs a finish that's food-safe, water-resistant enough to survive a quick wipe-down, and won't absorb the smell of whatever was on it last. The standard approach:
- Sand through 220-grit — end-grain is thirsty; don't stop at 150 or the surface will feel rough after the first oiling.
- Mineral oil, multiple coats — let each coat soak in for a few hours, wipe off the excess, repeat. Three to four coats the first time.
- Board butter or beeswax finish — after the mineral oil has cured overnight, apply a wax-based finish to seal the surface. This is what gives the board a soft sheen rather than a raw wood look.
- Re-oil every few months — end-grain boards dry out faster than face-grain because liquid wicks into the exposed pores more readily.
Avoid polyurethane, lacquer, or any film-forming finish. They eventually crack at the glue lines as the wood moves with seasonal humidity changes, and they're not food-safe once damaged.
Planning Your Build
The order of operations matters more on a charcuterie board than a prep board because the tolerances are tighter. A thick prep board can forgive a slightly uneven glue-up; a 1¼-inch charcuterie board has less room to plane flat without losing thickness.
General sequence:
- Mill and rip your hardwood strips to final width (account for kerf loss)
- Glue up the face grain blank, clamp flat, let cure 24 hours
- Surface the blank flat on both faces
- Rip the glued blank into strips of your target final board thickness
- Rotate 90° and glue up end-grain face up
- Surface the end-grain faces flat
- Cut to final dimensions, break edges, sand through 220
- Finish as above
Understanding the wood species you're working with helps at every step — check choosing the best wood for a cutting board for hardness ratings and workability notes on each species.
The Planning Shortcut
The most time-consuming part of building an end-grain charcuterie board is the mental math: strip widths, number of rows, total blank width, kerf loss, final dimensions after surfacing. It's easy to cut everything and then realize the finished board will be narrower than you wanted.
Cutting Board Designer handles all of that math for you — set your target finished dimensions, add your strips, dial in your blade kerf, and the app shows you exactly what blank you need before you touch a saw. The 2D preview also lets you audition different wood combinations side by side until the pattern looks right. For a board that's going to sit on a table in front of guests, it's worth getting the design right before committing to expensive hardwood.