Juice Grooves on End-Grain Cutting Boards
A juice groove sounds like a small detail — until you watch a Thanksgiving turkey drain across your countertop.
There's a question every end-grain cutting board builder hits eventually: should I add a juice groove? It sounds like a finishing touch — something you decide in the last ten minutes. In reality it's a design decision that affects your blank thickness, your router setup, and whether the board looks polished or like an afterthought. Get it right from the start and it's invisible in the best way. Add it as a last-minute carve-out on a board that wasn't planned for it, and it shows.
This guide walks through when a juice groove is worth it, how to dimension one properly, and how to bake it into your design before the first strip hits the planer.
When a Juice Groove Actually Makes Sense
Not every cutting board needs one. A juice groove solves a specific problem: liquids running off the board before you can collect them. That happens mainly when you're carving or slicing proteins — roast chicken, brisket, a pork shoulder. If a board is primarily for vegetables, cheese, or bread, a groove adds machining time and complexity without paying much back.
Here's a simple way to decide:
- Carving board (meat, poultry, roasts): yes, always. A 1-inch-deep groove running the perimeter is functional, not decorative.
- General prep board: optional. A shallow perimeter groove keeps the board looking intentional, but skip the inner moat.
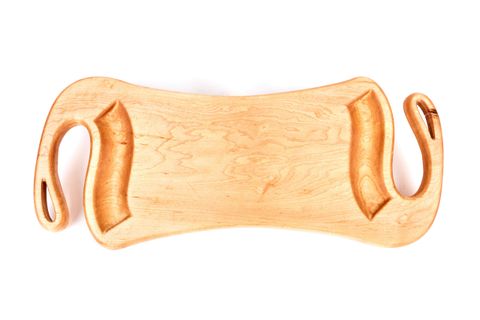
- Charcuterie / serving board: no. Grooves trap crumbs and make cleanup harder on a board that never sees a knife through raw protein.
- Small boards under 9 inches wide: skip it. There isn't enough real estate and the groove eats into the cutting area noticeably.
The end-grain construction itself helps here: the open pores of end-grain wick some surface moisture into the wood rather than letting it pool as fast as face-grain boards do. That's one reason juice grooves matter slightly less on end-grain than on edge-grain — but "slightly less" is not "not at all" when you're carving a 14-pound turkey.
Sizing the Groove: Depth, Width, and Placement
These three dimensions are where most builders either nail it or end up with something that looks off.
Depth
A juice groove needs enough capacity to hold liquid without overflowing mid-carve. The standard range is 3/8 inch to 1/2 inch deep. Go shallower and you'll overflow on anything juicier than a cucumber. Go deeper than 1/2 inch and you're removing meaningful material from a board that's already typically 1.5–2 inches thick — and the groove starts to look cavernous.
For end-grain specifically, 3/8 inch is usually the right call. End-grain boards often run thicker than edge-grain (you need the extra height to survive multiple surfacings over the board's life), so there's room, but a shallower groove complements the visual density of the end-grain face better.
Width
Width drives capacity more than depth does. A single groove cut with a 3/4-inch core box bit in two or three overlapping passes gets you to 3/4–1 inch wide, which holds enough liquid for most carving tasks. Some builders go wider on dedicated carving boards — up to 1.5 inches — but that starts to look industrial on a board meant for a home kitchen.
Placement
The groove typically runs as a rectangle 3/4 to 1 inch inset from the edge. That inset keeps the groove from intersecting the corner radius if you round your edges, and leaves enough of a border that the board doesn't feel fragile at the rim.
Don't run it all the way around. Leave a 1.5–2 inch break at one end — that's where you tip the board to drain into a container. Without a break, you have a moat with no outlet.
| Dimension | Typical range | Recommended for end-grain |
|---|---|---|
| Depth | 3/8″ – 1/2″ | 3/8″ |
| Width | 3/4″ – 1.5″ | 3/4″ – 1″ |
| Inset from edge | 3/4″ – 1″ | 3/4″ |
| Gap for draining | 1.5″ – 2″ | 1.5″ |
Planning It Before You Glue Up
This is where thinking ahead pays off. A juice groove is routed after the board is flattened and finished — but the planning happens at the design stage, because the groove affects three things you need to decide upfront.
Board Thickness
A 3/8-inch groove plus material below it means your finished board needs to be at least 1.5 inches thick, and ideally 1.75–2 inches. If you're gluing up a thin decorative board, adding a groove later will feel wrong. Build for the groove from the start by planning your blank height accordingly.
In the end-grain cutting board design guide, we cover how blank height is determined by your strip width before the glue-up rotation — that's the number to size correctly if you know a groove is coming.
Usable Cutting Area
A groove inset 3/4 inch from all four edges removes roughly 1.5 inches from both the effective width and length of your cutting surface. On a 12 × 16 board, you're left with about 10.5 × 14.5 of uninterrupted cutting area. That's still generous. On a 9 × 12 board, it starts to matter — budget for it when you pick your dimensions.
Wood Choices Near the Groove
This matters specifically with end-grain construction. When the router bit passes through the groove path, it cuts across the end faces of your wood strips. Harder species (maple, ebony, jatoba) rout cleanly. Softer or more porous species can tear or fuzz at the groove wall. If you're using a mix of species for contrast, run the denser species near the perimeter where the groove will land, or plan to sand the groove walls lightly with 220-grit wrapped around a dowel.
Routing the Groove: The Short Version
This isn't a full router tutorial, but here's the setup that produces clean results on end-grain:
- Bit choice: 3/4-inch core box (round-bottom) bit. Round-bottom grooves are more comfortable to clean than square-cornered ones and hide staining better.
- Depth in passes: Never rout to final depth in one pass. Three passes at 1/8 inch each gives the bit time to clear chips between cuts — end-grain produces long, stringy shavings that clog aggressively.
- Router fence or template: A shop-made template clamped to the board is more reliable than a fence on an irregular surface. Cut your template from 1/2-inch plywood, leave the correct inset, and clamp it square.
- Direction: Climb-cut the first light pass to prevent tearout at the groove edges, then conventional-cut to final depth.
- Sand the groove: 120-grit wrapped around a dowel removes any fuzz. Finish the groove with the same oil or wax you use on the rest of the board — don't skip it; bare wood in the groove will gray faster and stain unevenly.
Designing with the App
If you use Cutting Board Designer to plan your board, set your board dimensions to account for the juice groove before finalizing your strip layout. The app's 2D preview shows you the full cutting surface — plan your outer dimensions knowing that ~1.5 inches around the perimeter will be consumed by the groove. That way your cut list is accurate from the start and you're not recalculating after the glue-up.
Final Thought
A juice groove done well is barely noticeable — which is exactly right. It sits quietly at the edge, does its job when needed, and doesn't call attention to itself. The boards where it goes wrong are the ones where it was routed too shallow, positioned too close to the edge, or added to a board that wasn't built thick enough to handle it.
Plan the groove at the design stage, build for the right blank thickness, and route it carefully in light passes. That's the whole secret.
Ready to plan your next end-grain board? Download Cutting Board Designer to lay out your strips, set your dimensions, and get an accurate cut list before you touch the wood.